No Bake Salted Caramel Cheesecake Cups are the perfect solution for anyone craving a decadent dessert without turning on the oven. These luscious mini treats deliver layers of creamy cheesecake, buttery cookie crust, and rich salted caramel, all stacked neatly into individual serving cups. Whether you’re planning a summer party, need a quick holiday dessert, or simply want a fuss-free indulgence, these cheesecake cups are the answer.
The best part? No baking required. You can whip them up in minutes and chill until ready. In this article, we’ll guide you through every step—from selecting your dessert cups to customizing with toppings, using store-bought or homemade caramel, and even turning the cups into a large cheesecake version.
You’ll also learn handy prep-ahead tips and how to get the perfect no-bake texture every time. These no bake salted caramel cheesecake cups are not just eye-catching—they’re irresistibly delicious.
Looking for inspiration? Try this rich No-Bake Chocolate Lasagna Trifle that’s a hit at every gathering.
Now, let’s dive into everything you need to make the best salted caramel cheesecake cups without breaking a sweat.
Table of Contents
Why No Bake Salted Caramel Cheesecake Cups Are a Game-Changer
Effortless Dessert Without the Oven
There’s something magical about desserts that don’t require baking—and No Bake Salted Caramel Cheesecake Cups top the list. When you’re short on time but still want to impress guests (or treat yourself), these individual cheesecake cups deliver big on flavor with minimal effort. There’s no need to preheat an oven or worry about water baths. Just mix, layer, and chill. That’s it.
No bake desserts are especially great during hot weather or for last-minute get-togethers when you don’t want to turn your kitchen into a sauna. All the textures and flavors of a classic cheesecake come together in these portable, adorable cups—without the fuss.
Perfect for Parties, Picnics, or Solo Treats
One of the best things about no bake salted caramel cheesecake cups is their versatility. Hosting a dinner party or brunch? These mini treats are elegant and portion-controlled. Heading to a picnic or outdoor event? Pack them in disposable cups or mason jars with lids for a mess-free, crowd-pleasing dessert.
Even better—these cups cater to everyone. Whether it’s a cozy night in, a family birthday bash, or a baby shower, they’re universally loved. Plus, they store beautifully in the fridge, making them an ideal make-ahead dessert.
If you enjoy make-ahead sweets, don’t miss our Sticky Banana Bread Cinnamon Rolls—a rich, fluffy delight perfect for gatherings.
These cheesecake cups are proof that you don’t need to spend hours in the kitchen to create a show-stopping dessert. They’re rich, creamy, and laced with salted caramel that makes every bite unforgettable
Key Ingredients for the Perfect Cheesecake Cups

Creamy Cheesecake Base Without Baking
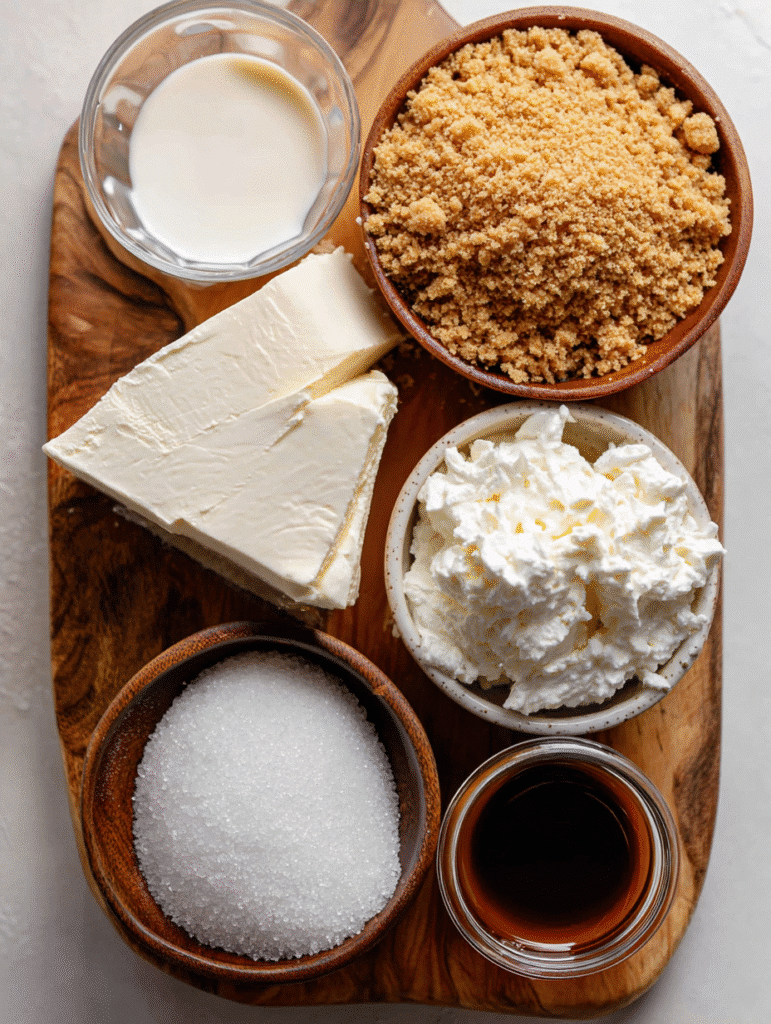
At the heart of No Bake Salted Caramel Cheesecake Cups lies a luxurious, creamy filling that’s unbelievably easy to prepare. You won’t need eggs or gelatin—just a few staple ingredients you probably already have. A smooth blend of softened cream cheese, powdered sugar, vanilla extract, and whipped topping or heavy cream creates a light, mousse-like texture that firms up beautifully in the fridge.
Want an extra lift in flavor? Add a dash of lemon juice to balance the richness and bring out that signature cheesecake tang. If you prefer an even creamier consistency, consider folding in a spoonful of mascarpone or Greek yogurt. These additions complement the cheesecake layer without overpowering the dessert.
What makes this base special is how it mimics the taste and texture of traditional cheesecake—without a single minute in the oven. That’s the magic of these No Bake Salted Caramel Cheesecake Cups: minimal work, maximum indulgence.
Choosing the Right Caramel: Store-Bought vs. Homemade
A frequent question we hear is: Can I use store-bought salted caramel sauce? Definitely! A good-quality store-bought caramel sauce works like a charm, especially if you’re short on time. Look for brands that list sea salt in the ingredients—this ensures that classic sweet-salty punch.
On the flip side, homemade caramel isn’t as intimidating as it seems. With just four ingredients—sugar, butter, heavy cream, and sea salt—you can create a rich, golden sauce that takes your dessert to the next level. Making it from scratch also allows you to control the thickness and saltiness to your liking.
Whether you go store-bought or homemade, this gooey layer of salted caramel is what transforms these No Bake Salted Caramel Cheesecake Cups from simply sweet to truly crave-worthy.
Discover great ideas like Banana Bread with Cinnamon Crunch if you’re into layered comfort desserts with bold flavors.
Selecting the Best Dessert Cups for Layering
What Size Dessert Cups Should I Use?
Choosing the right serving cup makes a huge difference in how your No Bake Salted Caramel Cheesecake Cups turn out. For clean layers and ideal portions, go with dessert cups that hold 4 to 6 ounces. This range gives you enough space for the cookie base, creamy cheesecake filling, and a generous layer of salted caramel—all without spilling over.
If you’re prepping these cheesecake cups for a party, 4-ounce sizes are perfect for bite-sized treats. For something more indulgent or a sit-down dinner, 6-ounce cups deliver that satisfying dessert portion. No matter the size, make sure it highlights the layers—because half the appeal of No Bake Salted Caramel Cheesecake Cups is how beautiful they look.
Types of Cups: Glass vs. Plastic vs. Mason Jars
Presentation counts just as much as flavor. Clear glass cups or mini trifle bowls are ideal for showcasing the layers of your No Bake Salted Caramel Cheesecake Cups. These work well for elegant dinners or holiday gatherings. If you’re planning a picnic or casual celebration, plastic dessert cups are lightweight, disposable, and easy to transport.
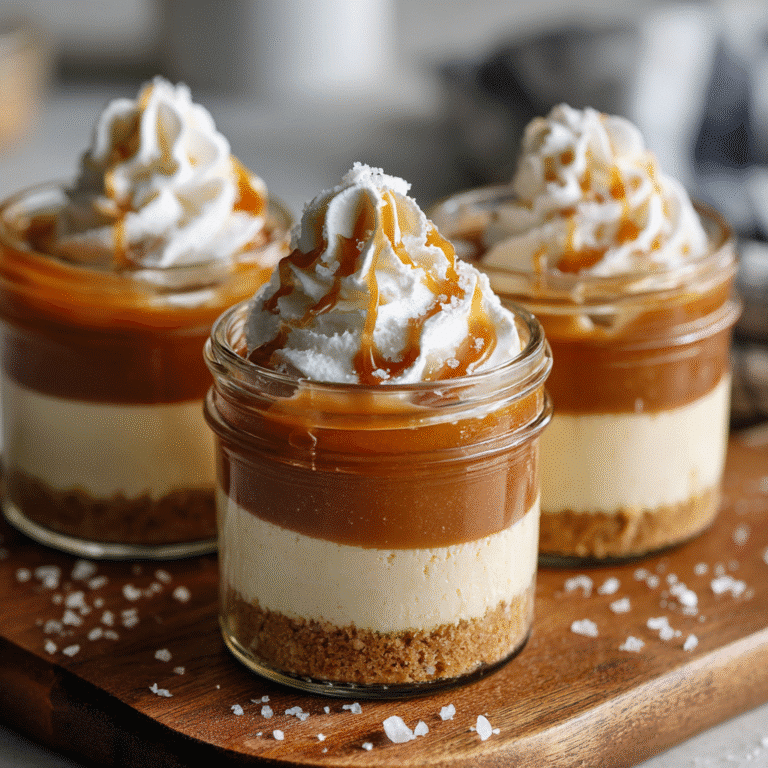
For something trendy and practical, try using mini mason jars. They come with lids, making them great for storing or traveling with your cheesecake cups. Plus, they’re reusable—making them both stylish and eco-friendly.
Don’t miss our Easy Homemade Pakora Mix, a clever way to serve flavorful snacks in single servings, much like these cheesecake cups.
Building the Layers – The Art of Assembling Cheesecake Cups
Layer 1: Buttery Cookie Crust
The first layer in your No Bake Salted Caramel Cheesecake Cups is all about texture and flavor contrast. You’ll want a buttery, crumbly base that mimics traditional cheesecake crust. The most popular choice? Crushed graham crackers mixed with melted butter and a pinch of sugar. You can also use crushed Biscoff cookies or shortbread for a deeper caramel note that complements the topping.
Just spoon the mixture into the bottom of each dessert cup and press it down with the back of a spoon. It doesn’t need to bake—just chill it for a few minutes while preparing your next layer. This crust adds structure and that satisfying crunch in every bite.
Layer 2: Creamy No Bake Cheesecake Filling
Now comes the star—your silky cheesecake filling. Made with whipped cream cheese, sugar, vanilla, and whipped topping, this layer brings rich, velvety smoothness to the dessert. Gently pipe or spoon it over the chilled crust and smooth it out for an even finish.
The creaminess balances perfectly with the crunch of the crust and the sweet-salty caramel that follows. If you want to get fancy, add a pinch of flaky sea salt right into the filling. It will subtly enhance the flavor of your No Bake Salted Caramel Cheesecake Cups.
Layer 3: Salted Caramel Topping
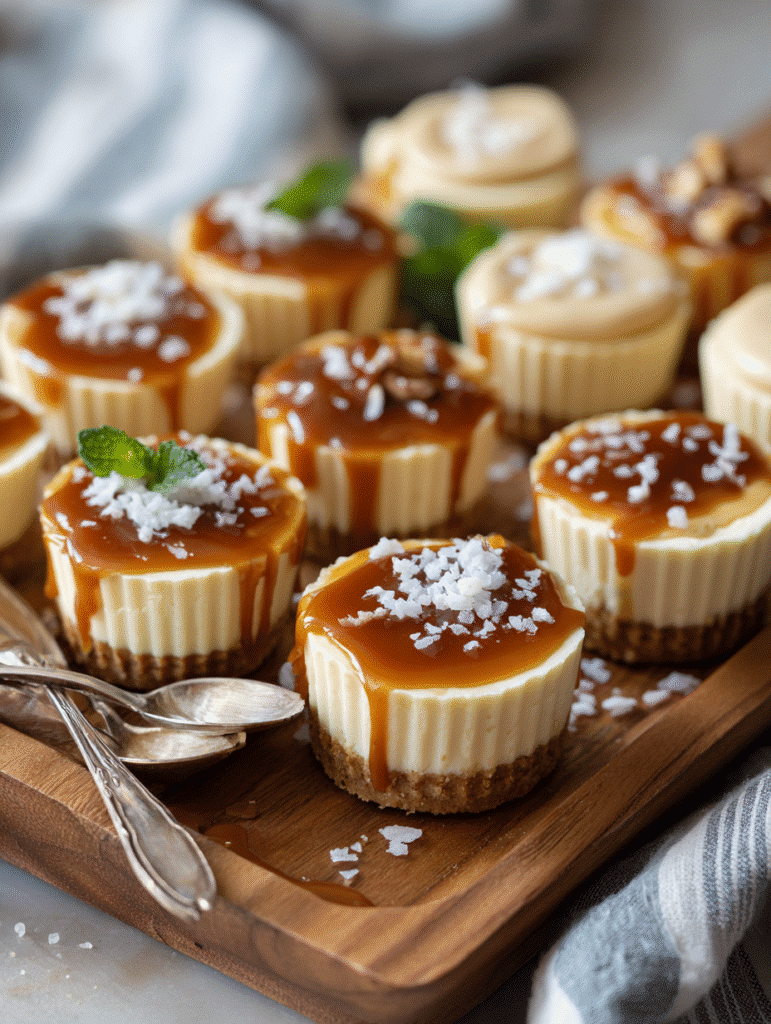
Finish strong with a generous spoonful of salted caramel on top. Whether you’re using store-bought or homemade sauce, this layer should gently drip over the edges of the cheesecake for maximum appeal. You can even swirl it lightly into the top of the filling for a marbled look.
Add a sprinkle of crushed cookies, sea salt flakes, or a small dollop of whipped cream for extra flair. The key to great No Bake Salted Caramel Cheesecake Cups is letting each layer shine—visually and in flavor.
Check out our Crispy Vegetable Pakoras if you’re into layered textures with a satisfying bite, just like in these cups.
Flavor Variations and Customization Ideas

Add a Fruity Twist
While the classic No Bake Salted Caramel Cheesecake Cups are indulgent on their own, adding fruit can elevate the flavor and brighten the dessert. Consider layering in sliced bananas, chopped apples, or a spoonful of apple pie filling between the cheesecake and caramel. The fruit adds freshness, balances sweetness, and makes each bite more dynamic.
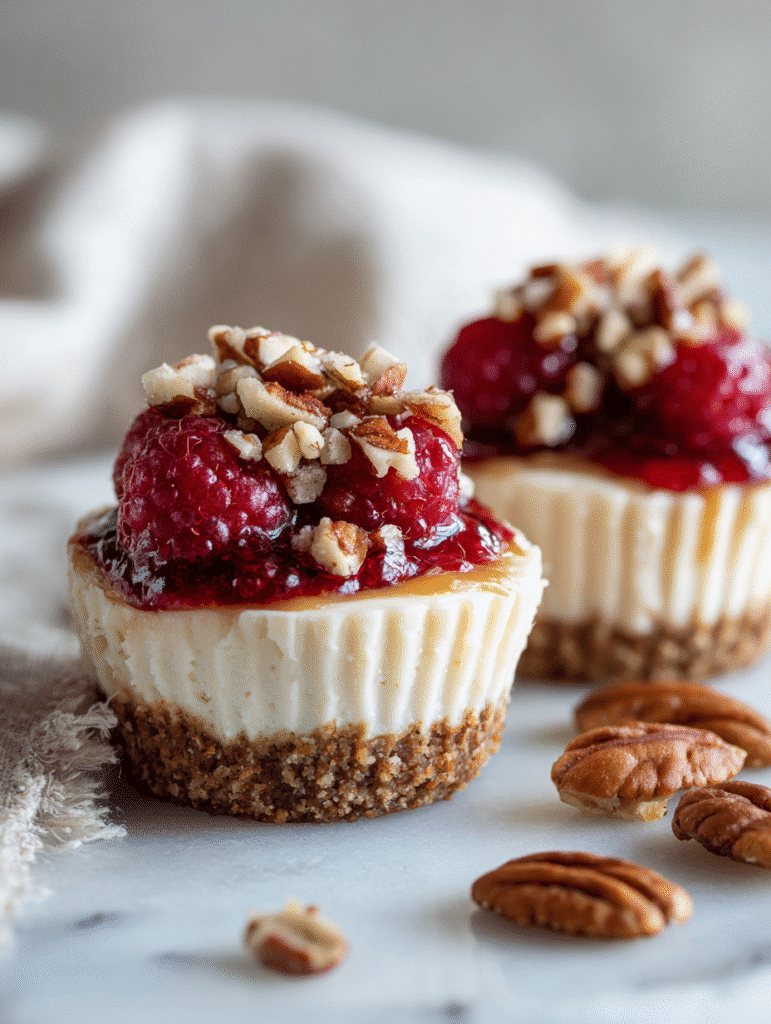
Prefer something tart? Add a swirl of raspberry or strawberry compote. Berries and caramel make a bold contrast—sweet, tangy, and irresistible. Just make sure your fruit layer isn’t too wet to preserve the structure of the cheesecake cups.
Chocolate Lovers, Rejoice
Chocolate and caramel are a match made in dessert heaven. You can add a thin layer of chocolate ganache under or over the caramel, or even stir cocoa powder into the cheesecake filling for a chocolate cheesecake base.
Another idea? Use chocolate cookie crumbs instead of graham crackers for the crust. The chocolate base intensifies the richness of your No Bake Salted Caramel Cheesecake Cups, especially when topped with extra chocolate shavings or chips.
Craving more chocolate inspiration? Try our No-Bake Chocolate Lasagna Trifle for another layered, decadent no bake dessert.
Go Nuts for Texture
To add crunch and contrast, consider topping your cheesecake cups with toasted pecans, crushed almonds, or even candied walnuts. These textures pair beautifully with the smooth filling and gooey caramel.
Just be sure to add nuts just before serving to retain their crispness. A sprinkle of sea salt with chopped nuts makes your No Bake Salted Caramel Cheesecake Cups not just gourmet—but unforgettable.
How to Store and Make Ahead Like a Pro
Can I Prepare These Cheesecake Cups Ahead of Time?
Absolutely. One of the biggest advantages of No Bake Salted Caramel Cheesecake Cups is that they’re a dream to prep in advance. You can make them up to 2 days ahead without sacrificing taste or texture. In fact, letting them chill overnight actually enhances the flavor and firms up the layers for that perfect scoopable consistency.
To prepare in advance, assemble the cheesecake cups up to the caramel layer. Cover each one tightly with plastic wrap or use lidded containers like mason jars to keep them fresh. Just before serving, add your garnishes like whipped cream, nuts, or sea salt for the best texture.
Best Storage Tips for Freshness and Flavor
When it comes to storage, the fridge is your best friend. Store your No Bake Salted Caramel Cheesecake Cups in an airtight container or individually wrapped cups to prevent them from absorbing odors. They’ll stay fresh for up to 3 to 4 days.
If you’re storing them in glass or plastic cups, make sure to place them on a flat surface in the fridge to avoid any spills or layer shifting. Want to freeze them? You can—just omit the caramel topping until after thawing. Wrap each cup in plastic and foil, then freeze for up to 1 month. Thaw overnight in the fridge before serving.
Don’t miss our Chocolate Chip Banana Bread if you’re also into make-ahead baked goods that stay moist and flavorful.
Serving and Presenting Your Cheesecake Cups

Make It Picture-Perfect
Presentation matters, especially when it comes to No Bake Salted Caramel Cheesecake Cups. These individual desserts already look stunning in clear cups, but you can take it a step further with thoughtful garnishes. A small swirl of whipped cream on top adds height and creaminess. For a touch of elegance, add a light drizzle of caramel sauce and a pinch of sea salt flakes.
You can even sprinkle on some crushed cookies, chocolate shavings, or toasted nuts for texture and flair. These little additions not only boost flavor but also make your No Bake Salted Caramel Cheesecake Cups stand out on a dessert table or at any gathering.
Serve them on a wooden tray, a mirrored platter, or even nestled in cupcake liners for added charm. If you’re hosting a party, place them on a tiered cake stand to wow your guests.
Tips for Serving at Parties and Events
For parties and holidays, pre-portioning these cheesecake cups is a huge time-saver. Serve them chilled straight from the fridge—they’re best enjoyed cold to keep the layers intact and the texture creamy. If you’re using glassware, make sure to chill the glasses beforehand for extra crispness.
Traveling with them? Place your No Bake Salted Caramel Cheesecake Cups in a cooler with ice packs to keep them firm. Lidded mason jars are excellent for outdoor events—they seal tightly and look amazing.
Want another party-perfect dessert idea? Don’t miss our Sticky Banana Bread Cinnamon Rolls for a cozy, shareable option your guests will rave about.
Want to Go Big? Make It a Full-Sized Cheesecake
Can I Make This as One Large Cheesecake Instead?
Yes, you absolutely can! While No Bake Salted Caramel Cheesecake Cups are perfect for individual servings, turning the same recipe into a full-sized cheesecake is just as easy—and just as delicious. The structure, ingredients, and layers remain the same, but the presentation shifts into a beautiful, shareable dessert that’s great for birthdays, holidays, or family gatherings.
Instead of dividing the crust and filling into cups, press the crust mixture into a 9-inch springform pan. Use the back of a spoon or the base of a flat glass to get it even and firm. Then spread your creamy cheesecake layer evenly over the crust and chill until set—usually about 6–8 hours or overnight.
Before serving, pour the salted caramel over the top and spread it to the edges. If you like, garnish with flaky sea salt, crushed nuts, or piped whipped cream around the border for an eye-catching finish.
A Few Tips for the Best Results
For a cleaner release, line the bottom of your springform pan with parchment paper before adding the crust. This makes it easier to transfer your cheesecake to a serving plate. Want neater slices? Chill your large cheesecake for at least 8 hours, and slice with a warm knife for the cleanest cut.
Just remember: while you’re skipping the cups, you’re not skipping the flavor. This large version of No Bake Salted Caramel Cheesecake Cups delivers the same luxurious texture and rich caramel goodness in every bite—just multiplied.
Looking for inspiration? Try our Crispy Vegetable Pakoras for a savory dish that’s great for family-style serving, just like this cheesecake version.
Common Mistakes to Avoid When Making Cheesecake Cups
Not Softening the Cream Cheese
One of the most common errors when preparing No Bake Salted Caramel Cheesecake Cups is using cold cream cheese. This can cause a lumpy texture in the filling, which ruins the smooth, airy consistency you’re aiming for. Make sure the cream cheese is fully softened to room temperature before mixing—it should be easy to blend with a spatula or hand mixer.
Skipping the Chill Time
Chilling your cheesecake cups is non-negotiable. If you serve them too soon, the layers won’t hold their shape, and the texture will be too soft. Refrigerate the assembled No Bake Salted Caramel Cheesecake Cups for at least 4 hours, preferably overnight. This ensures the filling sets properly and creates that rich, velvety mouthfeel.
Overfilling the Cups
It’s tempting to layer in more cheesecake or caramel than needed, but overfilling makes the cups messy and harder to serve. Stick to ¾ full to allow room for caramel topping and garnishes. This keeps each cup clean, portable, and picture-perfect.
Not Using the Right Caramel
Choosing the wrong caramel sauce can throw off the flavor balance. Avoid overly sweet or thin sauces that lack the salty contrast. Go for a thick, buttery caramel with sea salt to complement the creamy filling. Whether store-bought or homemade, the caramel should add depth—not overwhelm.
Need more tips on avoiding mistakes in prep? Discover our Easy Homemade Pakora Mix—where small details make all the difference too.
Frequently Asked Questions About No Bake Salted Caramel Cheesecake Cups
Can I use store-bought salted caramel sauce?
Yes, store-bought salted caramel sauce works perfectly in No Bake Salted Caramel Cheesecake Cups. Just make sure to choose a high-quality version with real sea salt listed in the ingredients. It should be thick enough to sit on top of the cheesecake without sliding off. Store-bought caramel is a convenient shortcut that still delivers rich flavor.
Can I make this as one large cheesecake instead?
Absolutely! You can easily turn your No Bake Salted Caramel Cheesecake Cups into a full-sized cheesecake by using a 9-inch springform pan. Layer the crust, filling, and caramel as you would in cups, and chill overnight for best results. It’s a great option for parties or when serving a crowd.
What size dessert cups should I use?
For the best results, use dessert cups that hold 4 to 6 ounces. This size offers the perfect balance of layers—crust, creamy cheesecake, and caramel topping—while keeping each portion just right. Clear glass or plastic cups work great to showcase the layers in your No Bake Salted Caramel Cheesecake Cups.
Can I prepare these cheesecake cups ahead of time?
Yes, and it’s one of the biggest perks of this dessert! You can prepare No Bake Salted Caramel Cheesecake Cups up to 2 days in advance. Just store them in the fridge, covered, and wait to add any whipped cream or toppings until right before serving. They store beautifully and even taste better after chilling overnight.
How long do they need to chill before serving?
You should chill No Bake Salted Caramel Cheesecake Cups for at least 4 hours, though overnight is ideal. Chilling allows the filling to set properly and the flavors to meld. Serving them too soon will result in a runny texture that doesn’t hold the layered look or creamy consistency.
Can I freeze these cheesecake cups?
Yes, you can freeze them—just hold off on the caramel and toppings. Assemble the base and cheesecake layer, wrap the cups tightly in plastic and foil, and freeze for up to 1 month. When ready to serve, thaw overnight in the fridge and add your caramel topping just before enjoying your No Bake Salted Caramel Cheesecake Cups.
For more follow us on Facebook and Pinterest
Print
No Bake Salted Caramel Cheesecake Cups
Lusciously layered mini no-bake cheesecakes with a buttery cookie crust, creamy filling, and gooey salted caramel—ready in minutes for parties, picnics, or solo indulgence.
- Total Time: 2 hours (including chill)
- Yield: 6 servings (4–6 oz cups)
Ingredients
- Cookie crumbs (e.g., graham crackers or digestive biscuits)
- Butter, melted
- Cream cheese, softened
- Powdered sugar
- Vanilla extract
- Whipped topping or heavy cream
- Store‑bought or homemade salted caramel sauce
- (Optional) Lemon juice, mascarpone or Greek yogurt for extra creaminess
Instructions
- Prepare cookie crust: mix crumbs with melted butter and press into 4–6 oz cups.
- Beat softened cream cheese with powdered sugar and vanilla until smooth.
- Fold in whipped topping (or whipped heavy cream) until light and mousse-like; optionally add lemon juice, mascarpone, or yogurt.
- Spoon cheesecake filling over crust in each cup.
- Top with salted caramel sauce.
- Refrigerate until set (see Notes).
- Before serving, garnish as desired (fruit, chocolate, nuts).
Notes
Use 4 oz cups for bite‑sized servings or 6 oz for larger portions. Store‑bought caramel is fine, but homemade (sugar, butter, cream, sea salt) gives better control. Chill cups at least 2 hours to set; you can prep ahead and keep covered in the fridge. For a large version, layer in a springform pan and chill similarly.
- Prep Time: 15 minutes
- Cook Time: 0 minutes
- Category: Dessert
- Method: No Cook
- Cuisine: American
- Diet: Vegetarian
Nutrition
- Serving Size: 1 cup (approx. 4–6 oz)
- Calories: 350
- Sugar: 22g
- Sodium: 180mg
- Fat: 24g
- Saturated Fat: 14g
- Unsaturated Fat: 8g
- Trans Fat: 0g
- Carbohydrates: 30g
- Fiber: 1g
- Protein: 5g
- Cholesterol: 60mg


